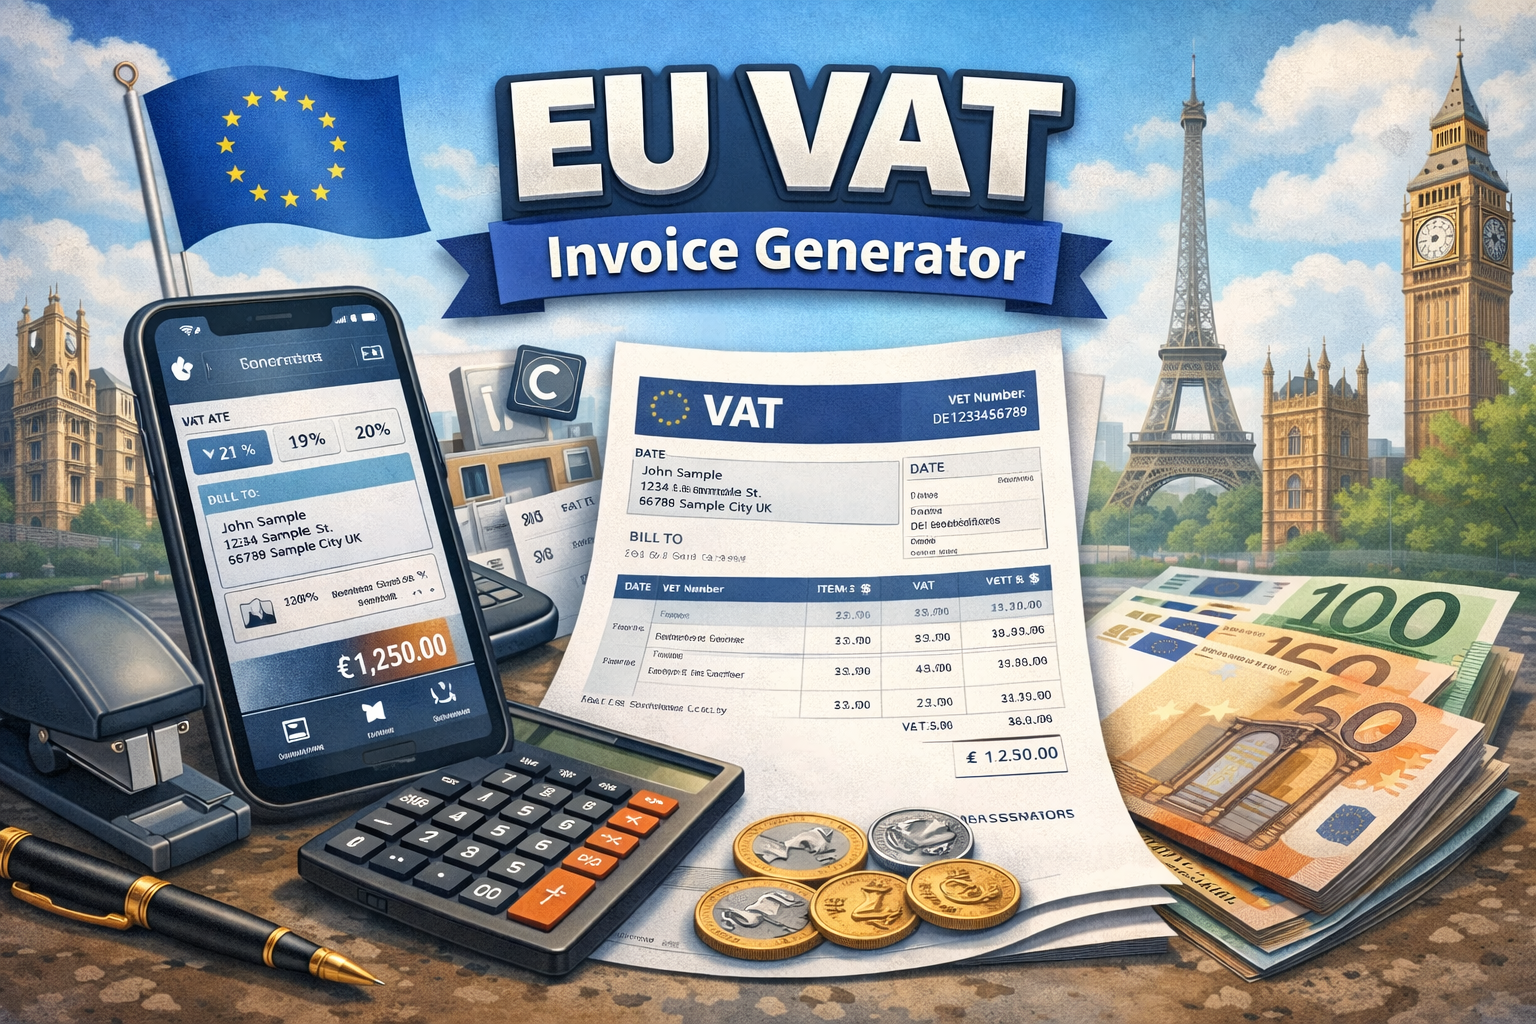
How to Create EU VAT Invoices on iPhone (Step-by-Step)
Tutorial: create EU VAT-compliant invoices on your iPhone in under a minute. Smart VAT logic, PDF export, and client management included.
Creating EU VAT invoices shouldn't require a degree in tax law. But if you've ever tried to figure out whether you need to charge local VAT, apply reverse charge at 0%, or skip VAT entirely — you know the pain.
EU VAT Invoice Generator handles all of that automatically. In this tutorial, I'll walk you through creating your first EU VAT invoice from scratch, managing clients, and exporting professional PDFs — all from your iPhone.
TL;DR: Download the free EU VAT Invoice Generator app, add your client with their VAT number, create an invoice with line items, and the app automatically applies the correct VAT rate (local VAT, 0% reverse charge, or VAT-free) based on EU rules. Export as PDF and share in under 60 seconds.
What You'll Need
- An iPhone or iPad running iOS 15.1 or later
- The EU VAT Invoice Generator app (free download)
- Your business details (name, address, VAT number)
- Your client's details
That's it. No accounts, no cloud setup, no configuration wizards. The app works fully offline and keeps all data on your device.
Step 1: The Invoice Dashboard
When you open the app, you land on the Invoices screen. This is your command center for managing all your EU VAT invoices.
You'll see all your invoices listed with their status: Draft, Sent, or Paid. Each invoice shows the client name, date, and total amount with the correct currency.
Use the filter tabs at the top to quickly find what you need — filter by status or by date range (All Time, This Month, Last Month, This Year). The search bar lets you find invoices by client name or invoice number.
At the bottom, tap "+ New Invoice" to start creating your first one.
Step 2: Add Your Client First
Before creating an invoice, you'll want to set up your client. Tap the Clients tab at the bottom of the screen.
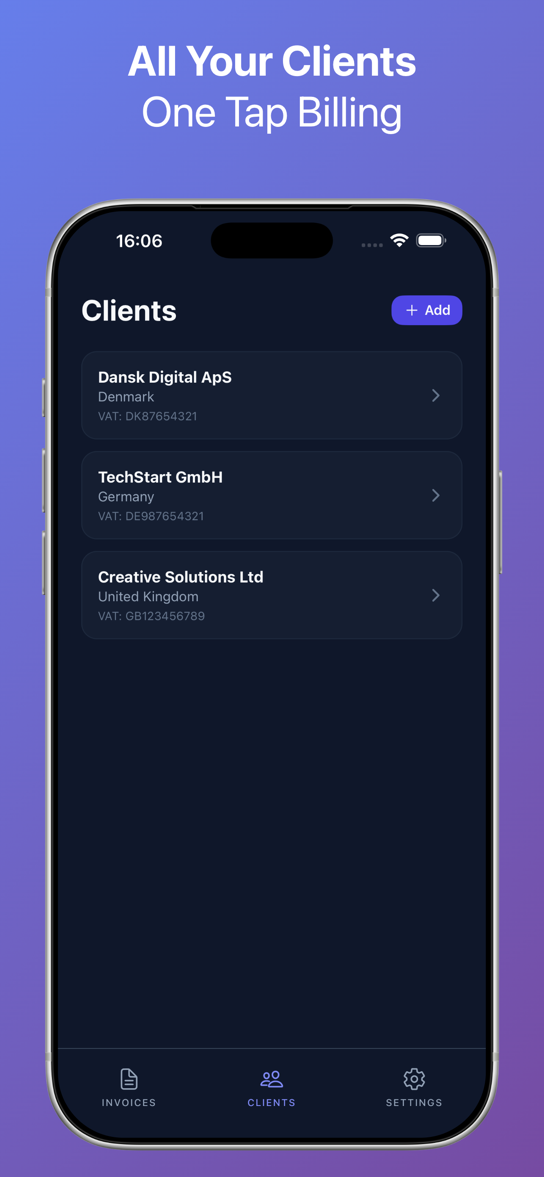
Tap "+ Add" in the top right to create a new client. Enter their:
- Company name
- Address
- Country
- VAT number (if they have one)
This is where the smart EU VAT logic kicks in. The app uses the client's country and VAT number to automatically determine the correct VAT treatment for every invoice you create for them.
EU VAT Rules — How the App Decides
| Your Country | Client Country | Client Has VAT # | VAT Treatment |
|---|---|---|---|
| EU | Same country | Yes or No | Local VAT rate |
| EU | Different EU country | Yes | 0% + Reverse Charge |
| EU | Different EU country | No | Local VAT rate |
| EU | Non-EU | N/A | No VAT |
You never have to think about this. The app handles it automatically — including adding the required reverse charge text to your invoice when applicable.
Once saved, your clients appear in a clean list showing their name, country, and VAT number. Tap any client to edit their details or create a new invoice directly.
Step 3: Build Your Invoice
Tap "+ New Invoice" from the Invoices screen, or start one from a client profile. The Edit Invoice screen keeps things simple.
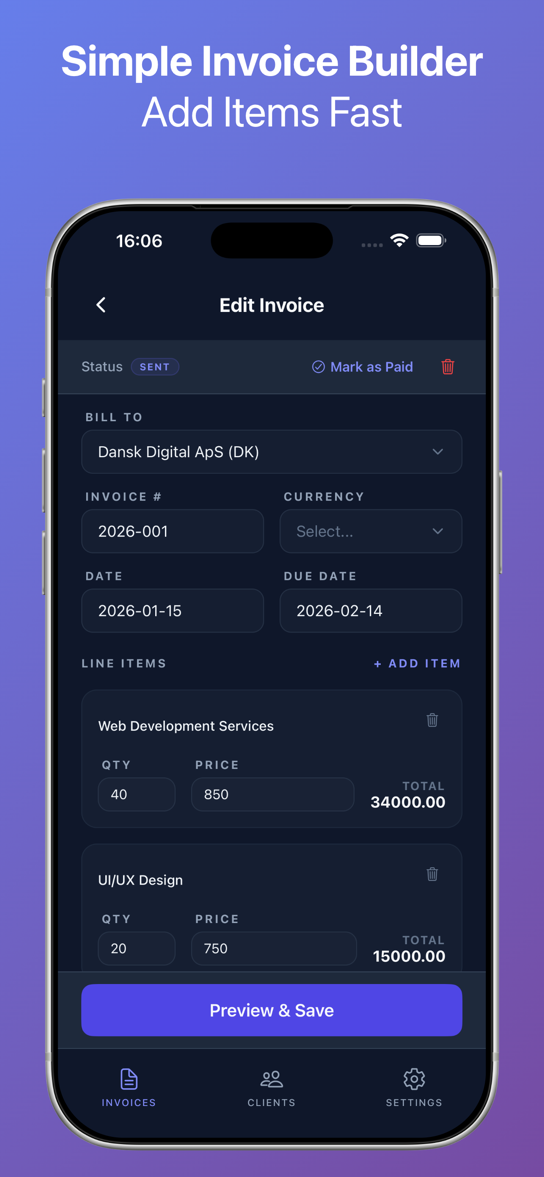
Fill in the basics:
- Bill To — Select from your saved clients
- Invoice # — Auto-generated (e.g., 2026-001), but you can customize it
- Currency — Pick the right currency for this client (EUR, DKK, GBP, etc.)
- Date — Invoice date
- Due Date — Payment deadline
Adding Line Items
Under Line Items, tap "+ Add Item" to add your services or products. For each item, enter:
- Description (e.g., "Web Development Services")
- Quantity (e.g., 40 hours)
- Price per unit (e.g., 850)
The app calculates the total for each line item automatically. In the example above, 40 hours at 850 = 34,000.00.
Add as many line items as you need. Each one shows its own total on the right side.
When everything looks right, tap "Preview & Save" at the bottom.
Step 4: Preview Your Professional VAT Invoice PDF
The app generates a clean, professional EU VAT invoice PDF instantly.

The preview screen shows your complete invoice with:
- Your business details and VAT number at the top
- Client details with their VAT number
- All line items with quantities, unit prices, and amounts
- Subtotal, VAT breakdown (with the correct rate), and Total
- Proper legal wording (reverse charge text is added automatically when applicable)
Use the zoom controls (- and +) to inspect the details. The status badge shows whether the invoice is Draft, Sent, or Paid.
You can also tap "Mark as Paid" right from this screen to update the invoice status.
Step 5: Export, Print, or Share Your Invoice
You have two options at the bottom of the preview:
- Print / PDF — Send to a printer or save as PDF to Files
- Share — Email, AirDrop, or send via any app on your phone
The exported PDF is a proper, professional document. It includes all the required fields for EU VAT compliance: your VAT number, the client's VAT number, itemized amounts, VAT rate, and total.
No watermarks on Pro. No "Generated by..." footer. Just a clean invoice you'd be proud to send to any client.
Managing Invoice Status
One detail that makes daily use smooth: invoice status tracking.
Every invoice can be in one of three states:
- Draft — You're still working on it
- Sent — You've sent it to the client
- Paid — Payment received
Update the status from the preview screen with one tap. Back on the dashboard, the colored status badges make it easy to see which invoices need attention.
Filter by status to quickly see all unpaid invoices, or check what you've sent this month.
Free vs. Pro
The app is free to download and use. Here's what you get:
Free:
- Up to 3 invoices per month
- Full VAT logic and compliance
- PDF export
- Client management
- Light watermark on PDFs
Pro (one-time purchase):
- Unlimited invoices
- No watermark
- Custom logo on invoices
- All future updates included
No subscription. Pay once, use forever. The way software should work.
Tips for Getting the Most Out of It
Set up your business details first. Go to Settings and enter your company name, address, and VAT number. This saves time on every invoice.
Save all your regular clients. The client list is your biggest time saver. Once a client is saved, creating a new invoice for them takes about 15 seconds.
Use consistent invoice numbering. The app auto-generates invoice numbers sequentially. Stick with the default format for clean bookkeeping.
Export PDFs to a cloud folder. After creating an invoice, share the PDF to your preferred cloud storage (Google Drive, iCloud, Dropbox) for backup and easy access from your computer.
Mark invoices as paid immediately. Keep your dashboard clean by updating status as soon as payments come in. Your future self will thank you.
Who Is This For?
- Freelancers billing EU clients across borders
- Consultants who need correct VAT on every invoice
- Small agencies that don't want full accounting software
- Developers and designers working with international clients
- Anyone who's tired of Googling "do I charge VAT to Germany"
If you send invoices within or across EU borders, this app eliminates the guesswork.
Frequently Asked Questions
Is EU VAT Invoice Generator free?
Yes. The app is free to download and use. You can create up to 3 invoices per month on the free plan. A one-time Pro upgrade unlocks unlimited invoices, removes the watermark, and lets you add your company logo.
Does the app handle reverse charge invoices?
Yes. When you invoice a client in a different EU country who has a valid VAT number, the app automatically applies 0% VAT and adds the required reverse charge wording to the invoice. No manual configuration needed.
Which EU countries and VAT rates are supported?
The app supports all 27 EU member states and their current VAT rates. It also handles invoices to non-EU countries (no VAT applied). VAT rates are kept up to date with EU regulations.
Can I use this app for invoices in different currencies?
Yes. You can select the currency for each invoice individually. Whether you bill in EUR, DKK, SEK, PLN, or any other currency, the app supports it.
Is my data stored in the cloud?
No. EU VAT Invoice Generator is fully offline and privacy-first. All your invoices, client data, and business details stay on your device. Nothing is uploaded to any server.
What information does a valid EU VAT invoice need?
A compliant EU VAT invoice must include: your business name and address, your VAT number, the client's name and address, the client's VAT number (for B2B), a unique invoice number, the invoice date, a description of goods or services, the net amount, the VAT rate and amount, and the gross total. The app includes all of these automatically.
Can I add my company logo to invoices?
Yes, with the Pro upgrade. Upload your logo once in Settings, and it appears on every invoice you create.
Does it work on iPad?
Yes. EU VAT Invoice Generator works on both iPhone and iPad running iOS 15.1 or later.
Download EU VAT Invoice Generator
Ready to stop worrying about VAT rules and start sending compliant invoices?
Download EU VAT Invoice Generator — Free on the App Store.
Visit the landing page for more details.
Building in Public
We're actively building, shipping, and experimenting. If you want to follow along, see what's coming next, or give feedback, you can find us here:
- Website: https://www.storqlabs.com/
- X (Twitter): https://x.com/StorqLabs